Wednesday, April 20, 2016

Colour Blast Embossed Layout


Hey everyone!
  Back again with another Colour Blast layout! 
I have included a step by step showing just how I created it, 
I hope you enjoy it and feel inspired!
So here is the page:


Now lets get on with the process:
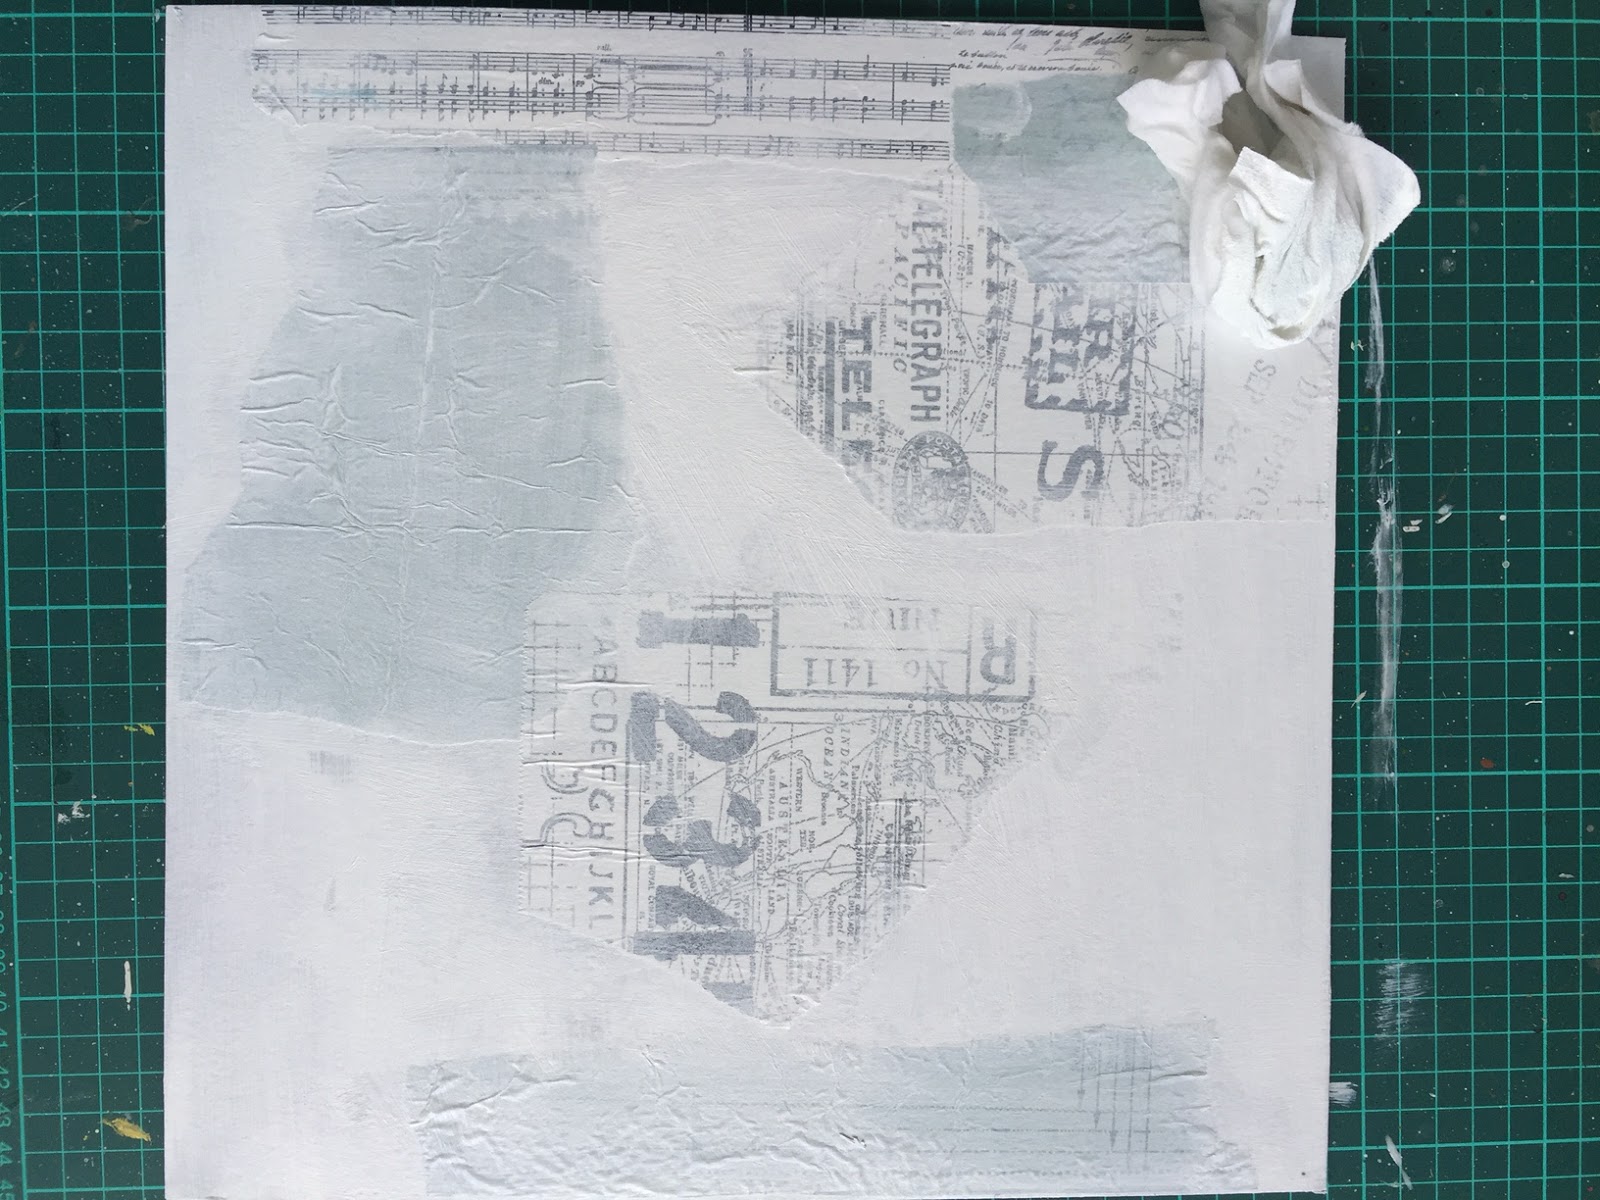
I have used chipboard as my base as I want to use a lot of wet medium and layers. Glue scraps of tissue onto the base then coat with Gesso. Rub back sections with a baby wipe to reveal parts of the printed tissue. Leave to dry.


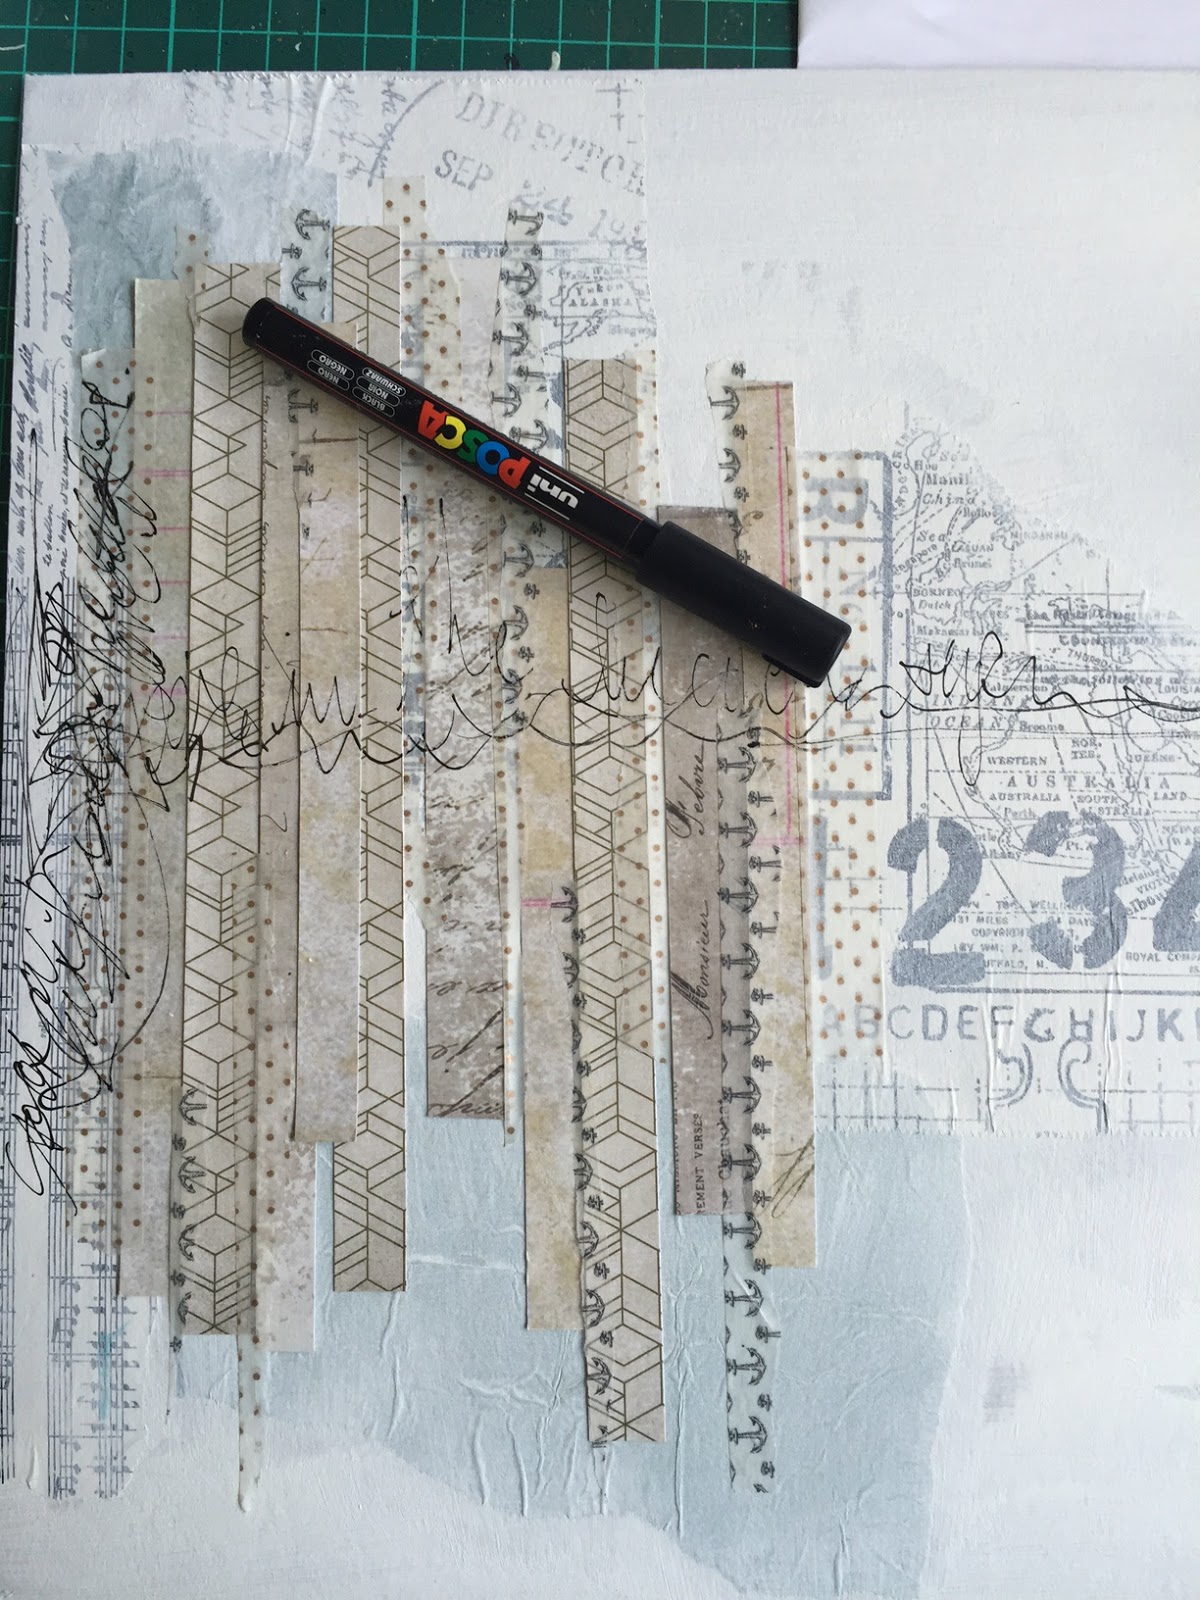
Glue down strips of patterned paper where you are going to place the photo or main focus of the page. Add a few pieces of worn washi tape. Choose a colour scheme to suit your photo.


Add some scribble with a paint pen over the strips. Using a stencil and Snow White colour paste add some texture.


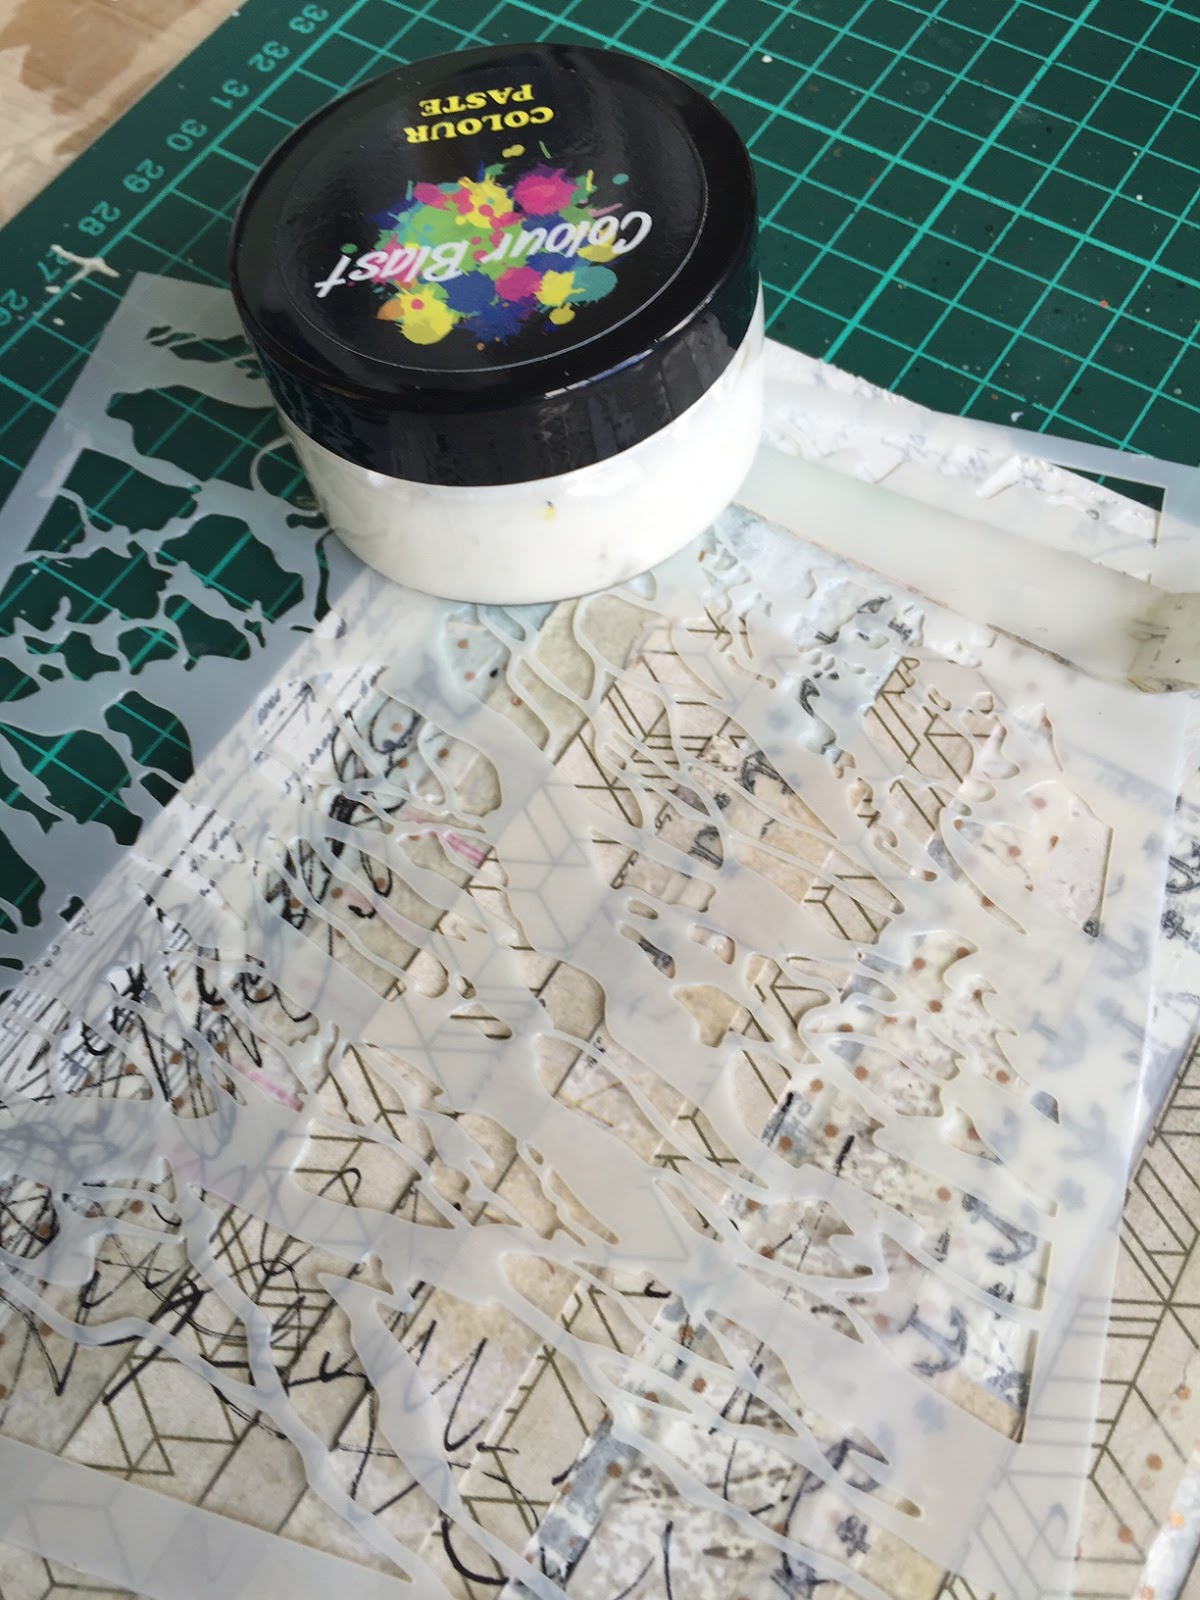
While the paste is still wet, sprinkle around embossing powder one colour of your scheme at a time. Heat to bring out that lovely shimmer and shine.


Use some of the shimmer sprays in the coordinating colours to add to the depth of colour.


Layer papers behind your photo ready to pull the page together. I then keep referring to this as I prepare my chippies and embellishments.  

Time to treat your chippies! I always give a coat of gesso while I decide on colour that best suits the project. Here I ended up using a pigment ink pad to colour and then embossed the "LIFE" part of the title.


The surfers looked better left white but I added a little shading with more ink. 

Now its time to put it all together. I glue down my photo and layers, then add the embellishments and some thread.


Once all is glued down I then added some elements that cross over the background as well as the layers, this pulls all the page elements together creating a cohesive composition. I have used a combination of sequins, and liquid pearls and the thread placement helps to do this too.

The page is now done, here are a few detailed shots:


Colour Blast Products used:
Colour Paste: Snow White
Shimmer Sprays: Singing the Blues, Bling & Steel.
Embossing Powders: Bling, Singing the Blues & Steel.

Scrap FX Products:
Surfers
#Travel
"Enjoying Life" Wordlet
Thanks so much for sticking with me on what turned out to be a long post!
Hope you enjoyed the process, see you soon!

Thursday, April 7, 2016

Colour Blast Fun!

Hi Everyone, 
I am back to share my latest LO using the fab Colour Blast Products!
I have also added a little step by step to let you in on how I did it, so here goes!
Here is the full LO:


So first of all lets create the background:
I used a foam roller and white paint to "roll" a strip down one side of my card, then glued random pieces of tissue down over the top. I then used more paint with a brush to create paint splashes.


I then added more splashes with shimmer sprays in Leather and Deep Water.


I then used a stencil, ruler and paint marker to add my circles and lines then it was time to create a little texture by spreading a little colour paste in the same 2 colours, Leather and Deep Water.


I just applied the paste with a plastic palette knife, then used another stencil and the Deep Water Colour Paste to add a bit of script to the background.


And the background is done, looks like a red hot mess at this stage doesn't it?! 
I then added the photo with a few paper layers underneath and tucked some black thread under the layers as I thought it needed more black to tie it all together.


Now time for the chipboard pieces! 
I treated them with a few colours and layers of embossing powder (Deep Water, Steel and Snow White). On the arrow pieces I sprayed the embossed piece with Shimmer Spray in Bling, don't ask me why! Cannot give you a good reason I just like the pooling colour look!


The title chippy is embossed with a few layers of Snow White Embossing Powder then I sprayed with Deep Water Shimmer Spray.
I then added some stamped words mounted on black matt board around the photo to add interest. 
And my page is done!


 The Colour Blast products used:
Shimmer Sprays: Deep Water, Bling & Leather
Colour Pastes: Deep Water & Leather
Embossing Powders: Deep Water, Steel & Snow White
You can find all the supplies HERE


Hope you were inspired to head off to your crafty corner and play!
Thanks for dropping by!


Tuesday, April 5, 2016

Scrap FX Project.


Hi Everyone back with a quick share, a LO for Scrap FX this month.
New Scrap Fx Products used:
Sea Scene SMALL - Click Image to Close
Sea Scene Large
Adventure Awaits
Wordlet
Seaweed stencil
Seaweed Stencil

And here is my beachy page:


I gave all the chippies a coat of gesso then coloured with mica paints and sprays, and added a few texture spots with embossing enamel.


I created the background using crackle paste by Viva Decor and sprays to highlight the cracks formed.


I wanted to create a background that had lots of movement like a wave, hey I tried!!


I added some micro beads and sequins to create a little more interest.


There you have it my first project for the month! 
To check out these new releases by Scrap FX you can find them all HERE
Be back soon with a little more!